Organization administration
Organization administration centralizes member access, security, storage, tax, AI and integration controls. These settings affect everyone in the organization, so review them with the person responsible for bids, privacy and identity management.
Prerequisites and access
UI path: top navigation → Administration
Only an organization Owner or Admin can open Organization administration and its Users, Invitations, Security, Storage, Tax groups, MCP server, Audit & data and Branding controls. Project Managers, Editors and Viewers receive 403 Forbidden if they try to use these organization-wide pages.
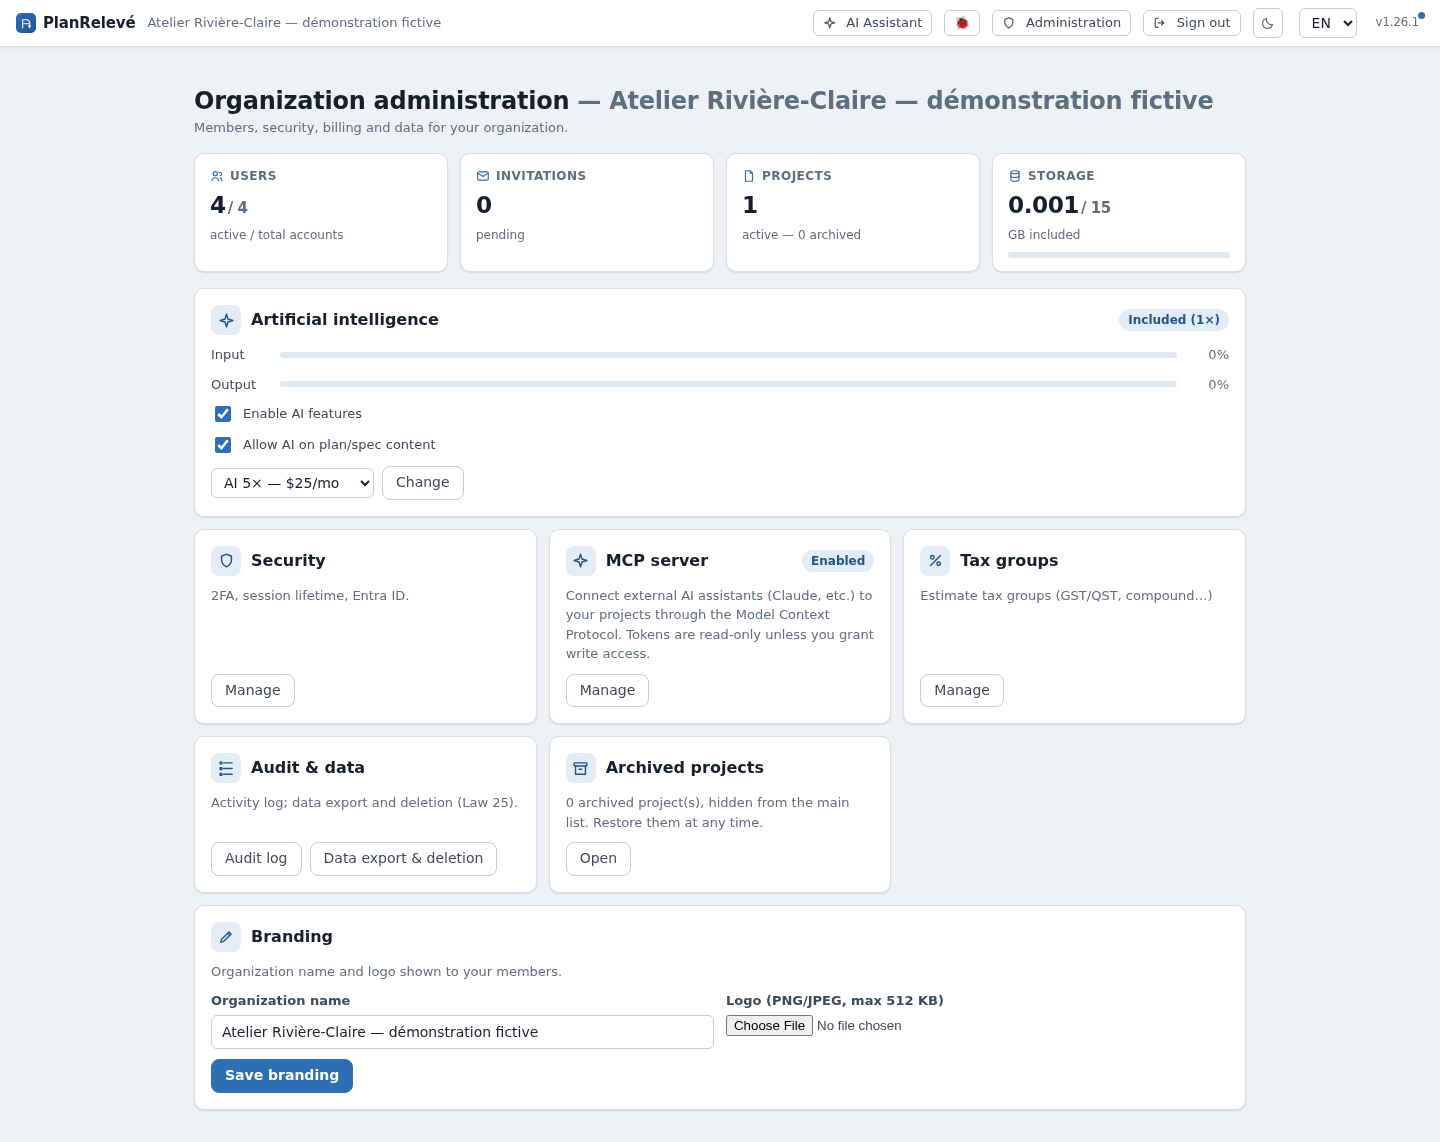
The dashboard summarizes active/total accounts, pending invitations, active/archived projects, used/included storage, the current AI tier and MCP Enabled or Disabled status.
Manage roles, invitations and sessions
Organization roles are Owner, Admin, Project manager, Editor and Viewer. Owner/Admin can administer the organization and create projects; Project managers can create projects and see all organization projects; Editors can create and edit their own/shared projects; Viewers require project access to work beyond their organization membership. A project role can refine access to one project. See Members, roles and invitations.
To invite someone:
- Open Administration → Invitations.
- Under New invitation, enter Email and choose Role.
- Optionally choose Project (optional) and its Project role: Viewer, Reviewer, Editor or Project admin.
- Select Send the invitation.
- Confirm the row shows Pending. It later becomes Accepted, Expired or Revoked.
Use Resend for an expired or lost invitation; it creates a new secure link and invalidates the old one. Use Revoke when the recipient should no longer join. Only an Owner can invite another Owner; an Admin cannot use an invitation to elevate someone above the Admin's authority.
Open Administration → Users to change an organization role, Deactivate, Reactivate or Delete an account. Deactivation immediately revokes that user's existing session and prevents a new sign-in. PlanRelevé will not let you deactivate, delete or demote the last active Owner/Admin; transfer responsibility first. A role change or reactivation that would change paid seats is not applied if billing synchronization fails. Review the seat rules in Subscription, seats, storage and AI.
Configure native sign-in and Microsoft Entra ID
UI path: Administration → Security
- Select Require email 2FA for native sign-ins if every password sign-in must pass a six-digit email code.
- Enter Session lifetime (minutes) from 15 to 10,080 (seven days).
- Select Save and wait for Saved.
The lifetime applies to new sessions; existing sessions expire normally. A user can select Trust this device for 30 days after email 2FA. Do not trust shared or public workstations.
For Microsoft SSO, select Microsoft Entra ID → Connect Microsoft, sign in as a Microsoft 365 administrator and grant the requested tenant consent. The result page shows Microsoft sign-in is connected and active. New Entra users join as Viewers until an administrator grants more access. If organization 2FA is required, Microsoft sign-in must report MFA. Keep at least one active Owner/Admin with a native password: PlanRelevé refuses to disable Entra without that fallback. See Security, privacy and Law 25.
Branding, storage and retention
Under Branding, update Organization name and optionally upload a PNG/JPEG logo no larger than 512 KB, then select Save branding. Verify the name and logo in the application header; Remove logo restores the platform branding.
Open Administration → Storage to compare Used, Included and Overage, with usage grouped by artefact type. Under File retention, enter a positive day count for Exports (days, empty = keep) and/or Renders (days, empty = keep), then select Save. Blank means no expiry value. These fields cover generated exports and page renders, not source PDFs, detections or audit records, and saving them is not an immediate-delete action. Use the data/deletion workflows for broader removal.
Set organization tax defaults
UI path: Administration → Tax groups
- Select Add group, name it and add ordered tax lines.
- Enter each Tax label and Rate %.
- Select Compound only when that line must tax the taxes above it.
- Mark one group Default, then select Save.
An unconfigured organization receives the Québec TPS/GST plus TVQ/QST default. A project uses the live organization default until someone chooses a tax group on its Estimate page; that selection freezes the current labels and rates into the estimate so later organization edits do not silently change that quote. No tax is also available. Verify jurisdiction and bid requirements rather than treating the default as tax advice. See Estimating, labour, margins and taxes.
AI consent, tier and MCP status
The AI card separates entitlement from consent:
- Enable AI features permits structured project features.
- Allow AI on plan/spec content is a second, separate consent for features that send plan or specification content.
- Accept the AI terms when enabling either control.
The card shows the current Included (1×), AI 5× or AI 20× tier and input/output usage percentages. Upgrades apply immediately where self-service billing is available; a downgrade is scheduled for the paid period end and can show Undo change until then. Consent can still be turned off independently of the tier. See AI assistant and approved actions.
The MCP server card reports Enabled or Disabled. Enabling external access and issuing tokens is a separate administrator action; AI consent does not enable MCP. Follow API and MCP integrations before connecting a client.
Audit and recovery
Use Audit & data → Audit log to investigate role, invitation, AI, MCP and other recorded administrative events. Use the organization data-export page for a controlled copy of organization data. If a save fails, read the inline error, reload to confirm the stored state and retry once; do not assume a checked box was persisted. For repeated authorization, identity or deletion failures, record the affected user, time and action without copying passwords, one-time codes or tokens into a support request.